In a large mixing bowl, combine the flour and baking powder.
Add the sugar, egg, and butter cut into small pieces. Begin mixing with a fork, then use your hands to bring everything together into a smooth, soft dough.
Avoid kneading for too long. You only need to combine the ingredients until the dough holds together and can be pressed easily into the pan.
Step 3: Shape the pastry base
Transfer the dough to the prepared springform pan.
Press it evenly across the bottom using your fingertips. Then gently push some of the dough up the sides to create a small edge.
This raised border will help hold the ricotta filling in place during baking.
Step 4: Prepare the vanilla ricotta filling
In a large bowl, combine the heavy cream, sugar, egg yolks, vanilla sugar, whole milk, and ricotta.
Add the vanilla pudding powder and mix thoroughly until everything is evenly combined.
If your ricotta has a grainy texture, use an immersion blender or regular blender to smooth out the mixture. This small extra step can make a noticeable difference in the finished cake.
The filling should be creamy and uniform, without large lumps.
Step 5: Add the filling
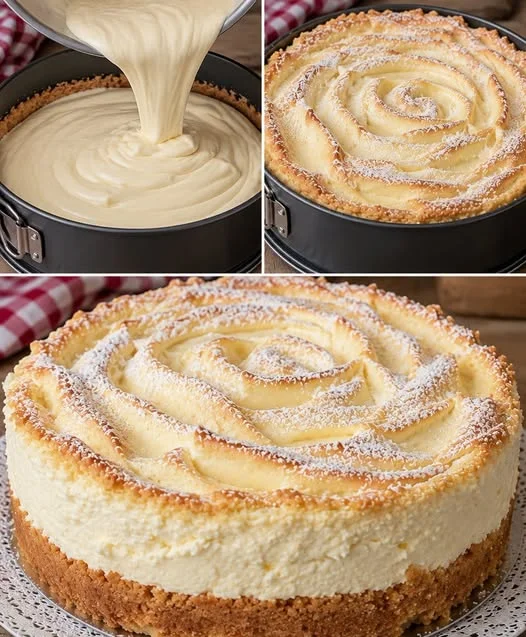
Pour the ricotta mixture carefully over the pastry base.
Use a spatula to spread it evenly, making sure the surface is level.
Your cake is now ready for its first round of baking.
Step 6: Bake the cake
Place the pan in the preheated oven and bake at 180°C (350°F) for approximately 50 minutes.
During this stage, the filling should begin to set and become firm enough to support the meringue topping.
Keep an eye on the cake toward the end of baking, as oven temperatures can vary. The center should no longer look completely liquid before you add the meringue.
While the cake is baking, prepare the topping.
Step 7: Make the meringue
The meringue is what gives this cake its distinctive appearance.
Place the three egg whites in a perfectly clean, dry mixing bowl. Beat with an electric mixer until they begin to form soft peaks.
Gradually add the 40 g of sugar while continuing to beat.
Keep mixing until the meringue becomes glossy, firm, and stable enough to hold its shape when you lift the beaters.
Adding the sugar gradually helps create a smoother, more consistent meringue.
Step 8: Spread the meringue over the cake
Once the first baking stage is complete, carefully remove the cake from the oven.
Spread the meringue evenly over the surface using a spatula.
For a smooth, elegant finish, level the top. If you prefer a more decorative appearance, use the back of a spoon to create small peaks and swirls.
Step 9: Bake until lightly golden
Return the cake to the oven for approximately 10 minutes.
Watch it closely during this final stage. The meringue should become lightly golden and set on the outside without burning.
Depending on your oven, it may brown faster than expected, so avoid leaving it unattended.
Step 10: Cool before serving
For Complete Cooking STEPS Please Head On Over To Next Page Or Open button